Halloween is the perfect opportunity to give your windows a spooky makeover without redecorating an entire room. The right Halloween Window Decorations can turn ordinary glass into a haunted scene, a glowing pumpkin display or a playful collection of ghosts and bats. Best of all, many designs use inexpensive materials such as black paper, removable window clings, cardboard and battery-operated lights.
Whether you live in a detached house, a modern apartment or a rented flat, there are plenty of ways to create an eye-catching display. Some ideas are subtle enough for a stylish autumn interior, while others are designed to catch the attention of passers-by after dark. Here are 15 creative options, along with practical advice for choosing materials, protecting your windows and keeping your seasonal display safe.
15 Halloween Window Decorations to Try This Year
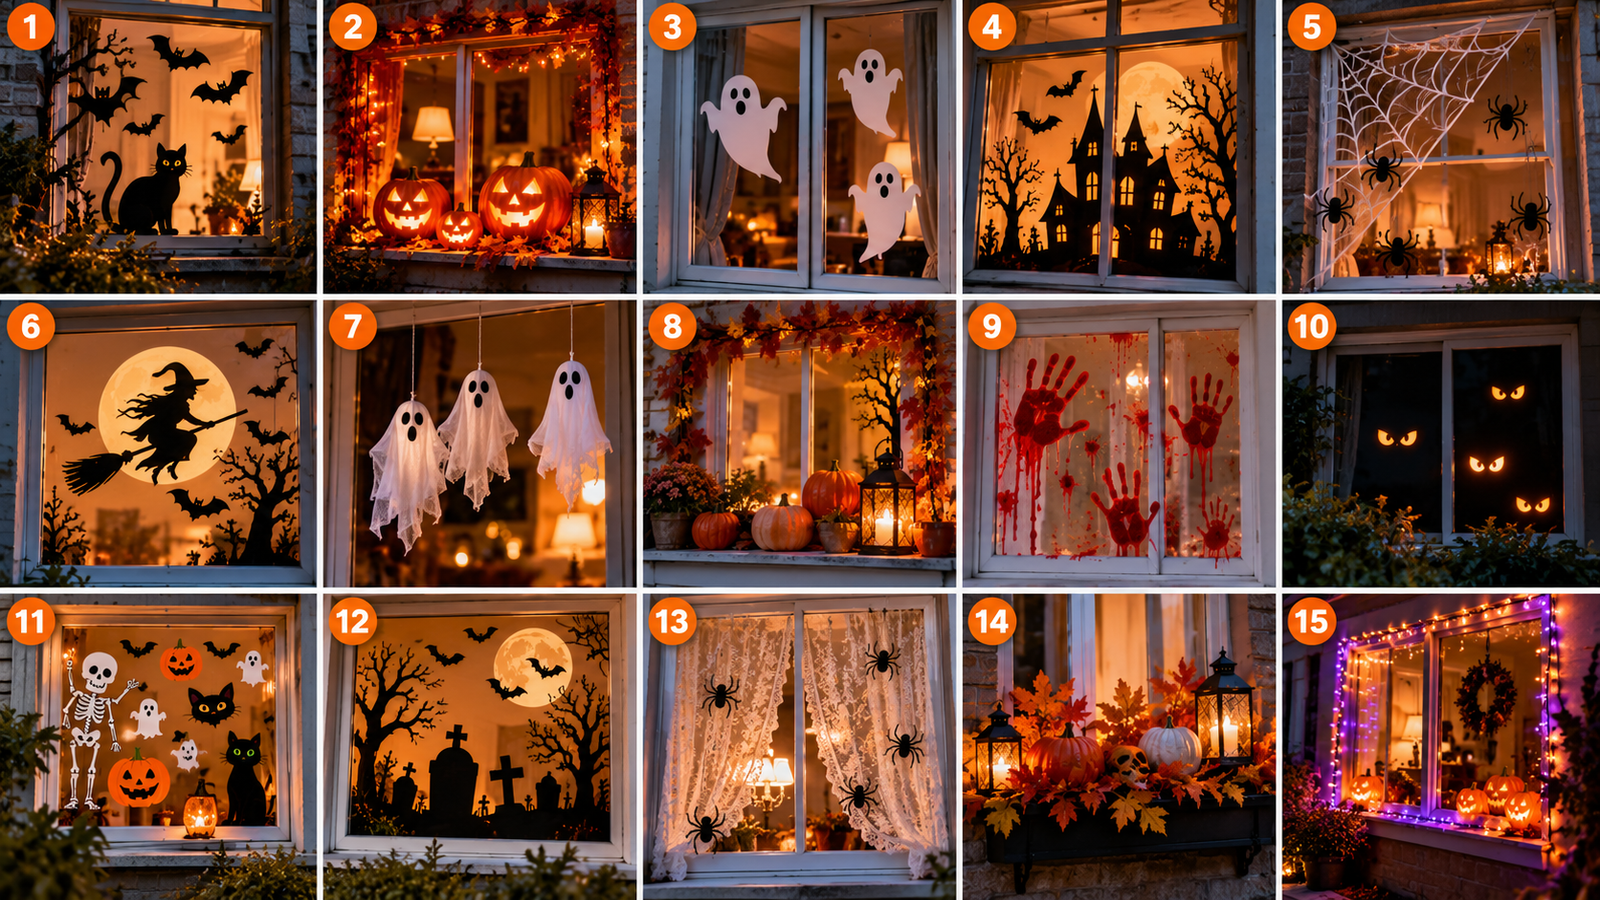
1. Black Cat and Bat Silhouettes
Black silhouettes are a classic choice for creating a haunted-house atmosphere. Cut cats, bats, owls, and crooked branches from black card, then arrange them against your window glass.
For a more dramatic effect, position the shapes so they appear to be moving across the window rather than sitting in a straight line. These Halloween Window Decorations are inexpensive, easy to make, and particularly effective when viewed from outside against a softly lit room.
2. Glowing Pumpkin Windows
Pumpkins instantly establish a Halloween theme. Arrange pumpkin-shaped cut-outs across the lower part of a window, or use translucent orange decorations to create a warm glow.
Place battery-operated LED lights behind suitable translucent materials to make the shapes more visible after sunset. Mix small and large pumpkins for a natural arrangement, leaving enough uncovered glass so the display doesn’t look crowded.
3. Ghostly White Window Clings
White ghost clings offer a simple alternative to elaborate decorations. Choose different ghost expressions and sizes, then scatter them across the glass.
You can purchase reusable window clings or make your own designs using suitable translucent materials. Keep the arrangement playful by varying the spacing between ghosts. These decorations work especially well in children’s bedrooms, kitchen windows and family living spaces.
4. A Haunted House Silhouette
Turn your window into a miniature haunted landscape with a crooked house, pointed rooftops, bare trees and tiny flying bats.
Cut the scene from black card and attach it with removable adhesive suitable for the surface. For a layered effect, place smaller shapes higher up and larger buildings along the bottom edge. A light-coloured curtain or softly illuminated room behind the silhouettes can help define the scene.
5. Spooky Spiderweb Patterns
Spiderwebs are ideal when you want a recognizable Halloween design without covering the entire window. Use white removable window markers designed for glass or attach lightweight paper webs to the corners.
Add a few small spider shapes around the edges rather than placing them everywhere. This creates a more believable scene and leaves space for natural daylight. Always check that window markers suit your glass and can be removed cleanly.
6. Witch Silhouettes and Flying Brooms
A witch flying across the moon creates an instantly recognizable Halloween scene. Cut a witch, broomstick, and circular moon from contrasting card, then arrange the pieces diagonally across the glass.
For extra detail, add small stars or bats around the moon. These Halloween Window Decorations suit both traditional houses and contemporary apartments because you can adapt the design to a small or large window.
7. Hanging Mini Ghosts
Create a floating ghost display using lightweight white fabric, paper, or other suitable craft materials. Suspend the ghosts from a secure indoor attachment point, keeping them clear of the window’s moving parts.
Use different lengths to give the display depth. For a minimalist look, three or four ghosts are usually enough. Avoid heavy objects above areas where people sit or walk, and don’t block an emergency escape window.
8. Autumn Leaves and Halloween Pumpkins
Halloween decorating does not have to rely entirely on frightening imagery. Combine orange leaves, muted brown accents, small pumpkins, and a few black details for a seasonal display that feels welcoming.
Arrange the decorations around the window frame or on a stable sill. This approach works well for homes where autumn styling needs to stay attractive after Halloween.
9. Bloody Handprint Window Effects
For a more theatrical haunted-house appearance, create red handprint shapes using removable window clings or a glass-safe decorative product.
Choose a product specifically intended for windows and follow its removal instructions. Avoid permanent paints, household dyes, or materials that may stain frames and seals. In family homes, consider whether the effect will frighten younger children before putting it on a prominent window.
10. Glowing Eyes in the Darkness
Glowing eyes can make a simple window display surprisingly effective. Cut eye shapes from dark card and place suitable battery-powered lights behind a translucent covering.
Use different shapes to suggest cats, monsters, or mysterious creatures hiding in the shadows. Keep the light source cool-running and compatible with the surrounding materials. Do not leave decorative lighting with damaged wiring in use.
11. Halloween Window Stickers
Reusable window stickers are one of the easiest ways to decorate without cutting out individual shapes. Look for sets featuring skeletons, pumpkins, ghosts, witches, and black cats.
Before applying the stickers, clean and dry the glass as the manufacturer directs. Arrange the largest designs first, then fill the gaps with smaller motifs. This method is especially convenient for renters because removable products minimize the need for permanent fixings.
12. A Moonlit Cemetery Scene
Create a spooky cemetery using black silhouettes of gravestones, leafless trees and a large white or pale-yellow moon.
Place the moon towards the upper half of the window and arrange the gravestones along the bottom. A few flying bats provide movement without making the scene too busy. This design works especially well in a living room or front-facing window visible from the pavement.
13. Lace Curtains with Spider Decorations
For a subtler look, pair existing lace curtains with a few lightweight black spiders or web-shaped decorations. The lace creates a delicate, slightly eerie backdrop without requiring a complete interior change.
Attach decorations only where the fixing method is compatible with the curtain or window surface. Keep fabric away from candles, heaters and hot light sources.
14. Halloween Window Boxes
For a house with suitable exterior window boxes, create a seasonal arrangement with artificial pumpkins, faux autumn leaves and weather-resistant Halloween ornaments.
Check that the box is securely fixed and that decorations cannot fall onto pedestrians below. Choose materials suited to local weather conditions, particularly in exposed or windy locations. If you live in a flat, an indoor sill display offers a similar look without placing objects outside.
15. A Halloween Window Light Display
Use a short string of suitable decorative lights to outline part of the window or highlight a themed scene. Orange, purple and warm-white lighting can produce different moods, from playful to mysterious.
Choose lights rated for indoor or outdoor use, inspect the wiring, and follow the manufacturer’s connection instructions. Keep cables away from moving window frames, avoid overloaded sockets, and switch the lights off when leaving home or going to bed, following the product guidance and local safety advice.
How to Make Halloween Window Decorations Look Professional
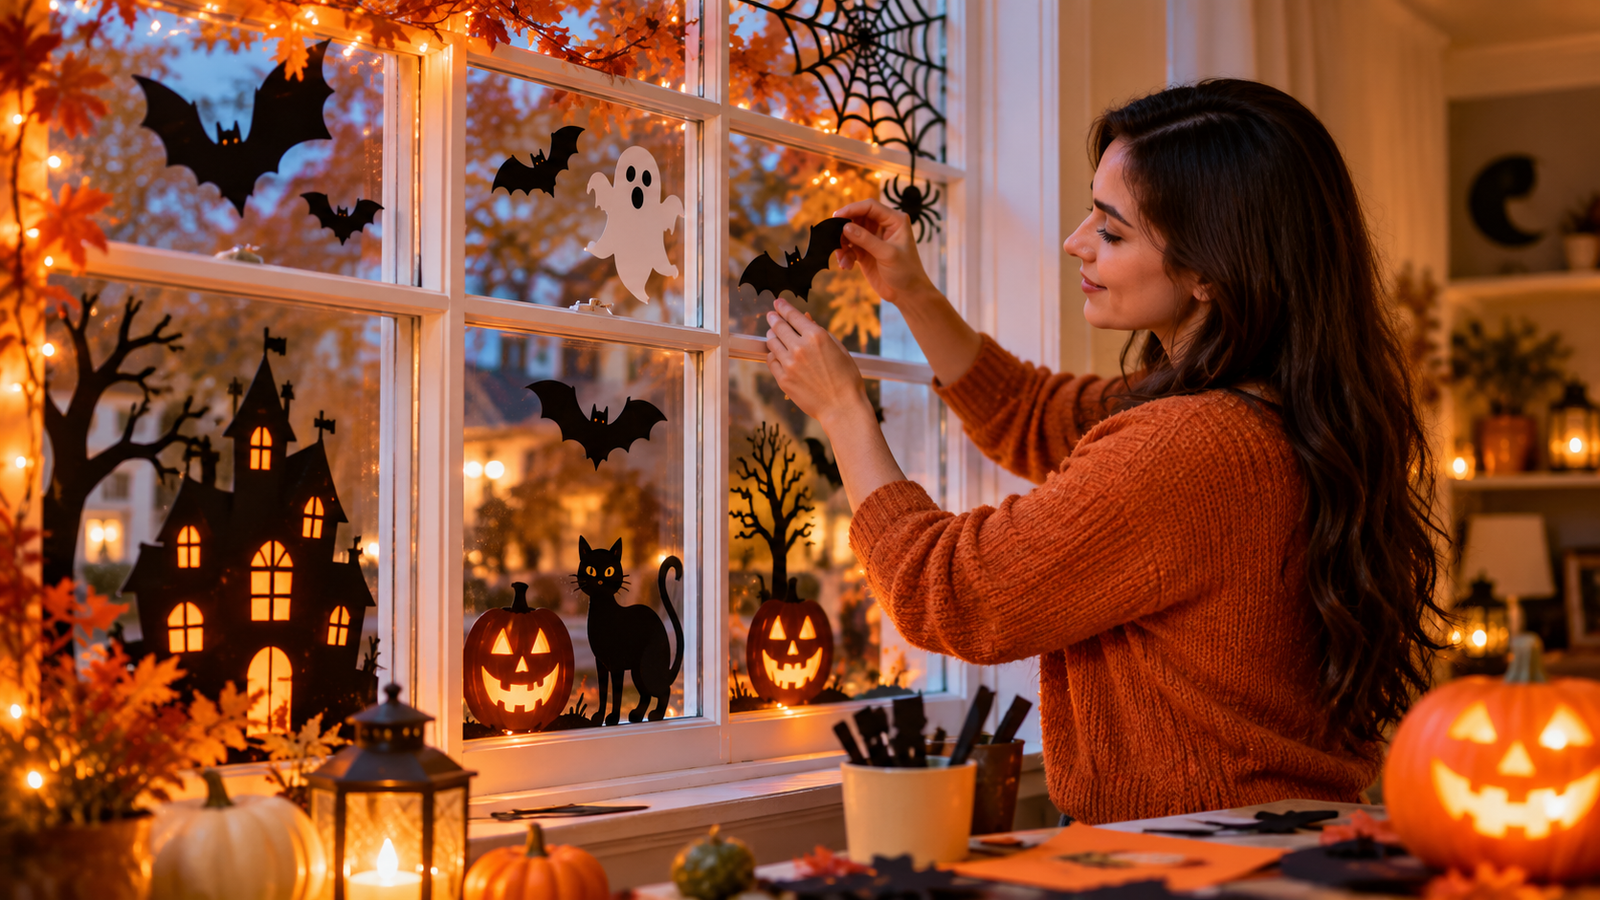
A successful display depends more on arrangement than on how many objects you use. Choose one main theme, such as a haunted house, pumpkin patch, or ghost collection, and repeat two or three complementary colors.
Consider the view from both sides of the glass. If your display is mainly for people outside, position the designs to face the street. If you want to enjoy them indoors, make sure the shapes and colors remain attractive from inside, too.
Before attaching anything, clean the glass and test the chosen adhesive on a small area. Removable adhesive pads, suitable suction cups, and purpose-made window clings can help, but no fixing method suits every surface. Follow the manufacturer’s instructions, particularly on older windows, painted frames and delicate finishes.
For rented properties, favor removable products and avoid drilling into frames without permission. If a window opens for ventilation or serves as an escape route, keep its handles, hinges and opening area accessible.
Budget-Friendly DIY Decorating Tips
You can create impressive
Halloween Window Decorations without purchasing an expensive ready-made set. Black card, white paper, scissors, and removable adhesive can provide the foundation for many designs.
Reuse plain decorations by rearranging them or combining them with new paper cut-outs. Store reusable pieces flat in a dry place after the season, and keep adhesive products in their original packaging where practical.
For a cohesive display, use a simple color palette: black and white for a traditional spooky look, orange and black for a pumpkin theme, or purple and silver for a more contemporary style.
Safety matters, too. The London Fire Brigade recommends flameless LED candles as a safer alternative to real flames and advises keeping candles away from curtains and other combustible materials. Keep open flames away from Halloween decorations, and use battery-operated lighting for illuminated window displays.
Frequently Asked Questions
What are the easiest Halloween Window Decorations to make?
Black paper bats, white ghost shapes, and pumpkin silhouettes are among the easiest options. They require few materials, can be arranged in different patterns, and are straightforward to remove after Halloween.
How can I decorate windows for Halloween without damaging them?
Use window clings, glass-safe markers, or removable adhesive products designed for your surface. Test an inconspicuous area first, follow the manufacturer’s instructions, and avoid permanent paint or aggressive adhesives.
Which Halloween window decorations look best at night?
Silhouettes, translucent pumpkin shapes and moonlit haunted-house scenes work particularly well after dark. Soft battery-operated lighting behind suitable materials can make the designs more visible.
Can I decorate windows in a rented flat?
Yes. Lightweight window clings, removable silhouettes and small indoor sill arrangements are practical choices. Check your tenancy agreement before attaching anything to exterior surfaces or altering window frames.
How can I make Halloween window decorations on a budget?
Use leftover cardboard, paper, scissors and suitable removable adhesive to create bats, ghosts, cats and haunted-house shapes. Reusing materials from previous years can also reduce waste and costs.
How do I keep Halloween window decorations safe?
Keep decorations away from open flames, heaters and hot light sources. Use appropriate lighting, inspect electrical products, and avoid obstructing window handles, ventilation openings, or emergency escape routes; secure exterior items against wind and falling hazards.





One Comment